Various functions in SmartCare display the My Calendar page. Using the My Calendar page is the same regardless of where you accessed the page from.
From the My Calendar page, you can:
Display the Calendar for a Different Staff Member
Create a Staff Group to Display Calendars for a Group
Display Calendars for a Group
Display Calendars for Multiple Selected Staff Members
Change the Intervals to View on a Calendar
Add a New Calendar Entry on a Calendar
Add a New Service Entry on a Calendar for a Client
Add a New Primary Care Entry on a Calendar for a Client
Add a New Resource Entry on a Calendar
Change the View of the Calendar(s)
When you access the My Calendar page from the Service Detail page for a specific client, the client's assigned staff member's calendar is displayed. You can change whose calendar is displayed.
Make sure the My Calendar page is displayed. View field definitions.
Note: if you accessed the My Calendar page from a specific client's record, the staff member assigned to that record is displayed in the second drop down list and the first drop down list displays the Single-Staff View option.
To select a single staff member, make sure the Single-Staff View is selected in the first drop down list.
Select the staff member whose calendar you want to display from the second drop down list.
Click the Apply Filter button.
The selected staff member's calendar is displayed.
Continue working with the calendar.
When you are done working with the calendar, click the Exit ![]() icon
to exit from the My Calendar page.
icon
to exit from the My Calendar page.
Make sure the My Calendar page is displayed. View field definitions.
Note: if you accessed the My Calendar page from a specific client's record, the staff member assigned to that record is displayed in the second drop down list and the first drop down list displays the Single-Staff View option.
From the first drop down list, select the Multi-Staff View option.
Notice the second drop down list is blank and the Single Staff button is changed to Define Group and is active.
Click the Define Group button.
The Define Group window is displayed. View field definitions.
Type a name that identifies the group of staff in the Staff View Name field.
In the Define View section, select the staff members you want to add to the group. Or, click the All check box to select all staff members listed.
Click the Insert button.
The group is saved and listed in the Staff View section.
Click the Save button to save your work.
Click the Close button to close the window.
The My Calendar page is displayed.
Notice that the second drop down list is now called Select Group.
Change the intervals on the calendar, if needed.
Click the Apply Filter button.
The calendar for each staff member in the group is displayed.
Continue working with the calendar.
Click the Exit ![]() icon to exit from the My
Calendar page.
icon to exit from the My
Calendar page.
Make sure the My Calendar page is displayed. View field definitions.
Click on the drop down arrow in the Select Group drop down list and select the group whose calendars you want to display.
Change the intervals on the calendar using the third drop down list, if needed. Tell me how...
Click the Apply Filter button.
The calendar for each staff member in the group is displayed.
Work with the calendars.
Click the Exit ![]() icon to exit from the My
Calendar page.
icon to exit from the My
Calendar page.
Make sure the My Calendar page is displayed. View field definitions.
Click on the drop down arrow in the first drop down list and select the Multi-Staff Selected option.
The second drop-down list is grayed out. The button is changed to Select Multiple Staff and is active.
Change the intervals on the calendar using the third drop down list, if needed. Tell me how...
Click the Select Multiple Staff button.
The Staff List window is displayed.
Select the staff whose calendars you want to display.
Click the OK button.
The Staff List window is displayed.
Click the Apply Filter button.
The calendars of the staff members you selected are displayed.
Work with the calendars.
When you are done working on calendars, click the Exit
![]() icon to exit from the My
Calendar page.
icon to exit from the My
Calendar page.
Make sure the My Calendar page is displayed. View field definitions.
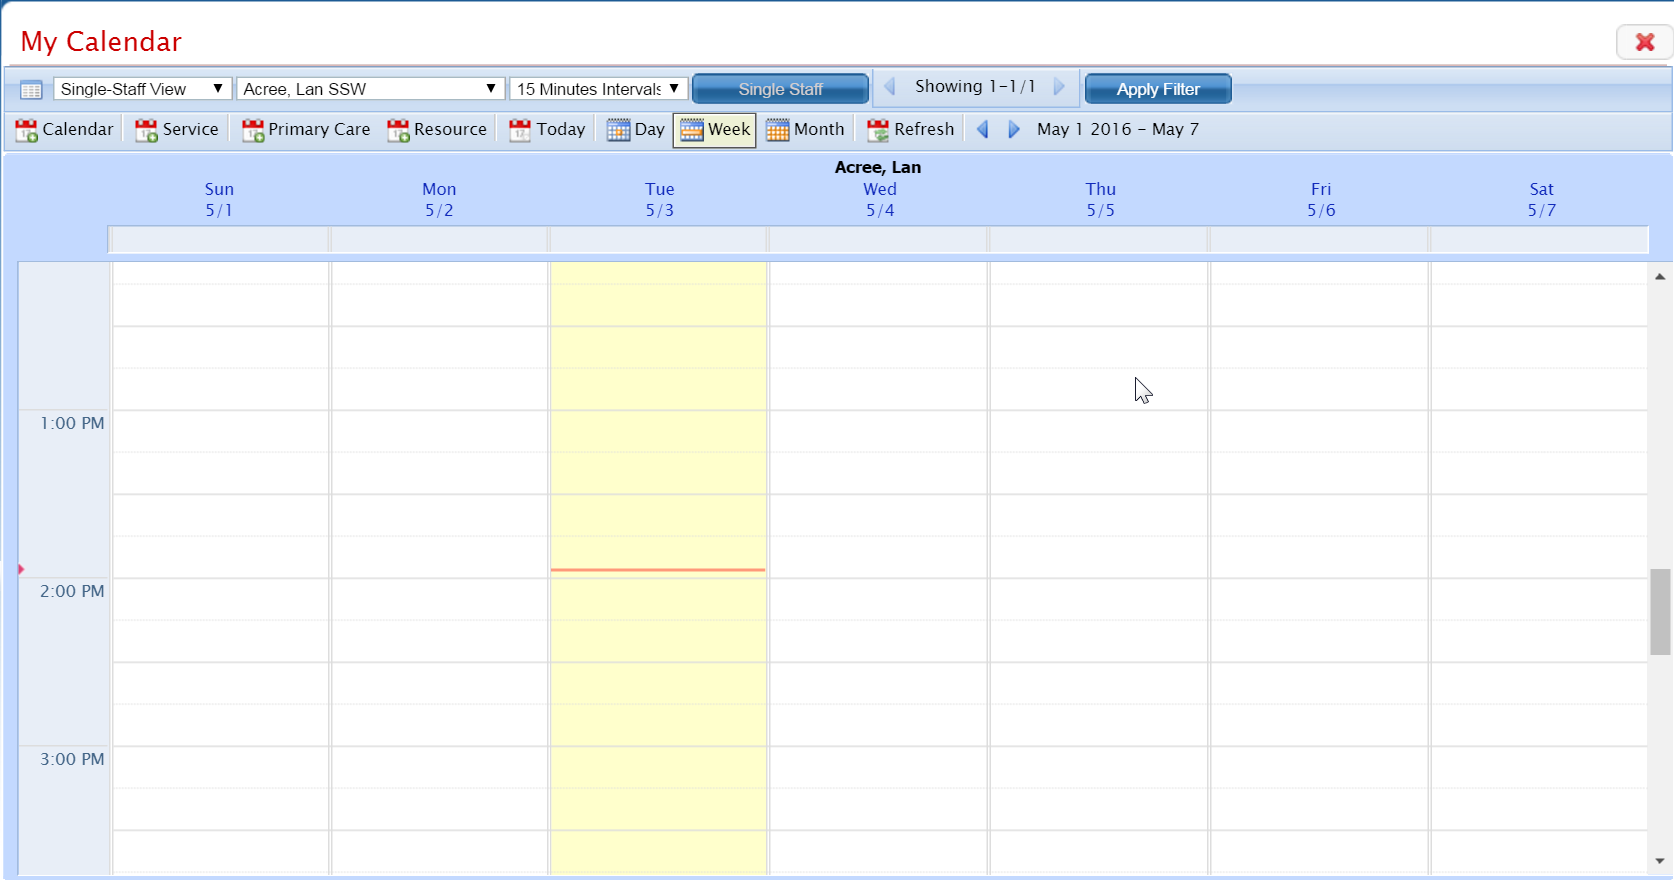
In the third drop-down list, select the time interval you want to display in the calendar(s). See the red box in the screen image below for the interval drop down list.
![]()
Make other changes in the drop down lists, if needed.
Click the Apply Filter button.
The calendars are displayed with the time intervals you selected.
Work with the calendars.
When you are done working on calendars, click the Exit
![]() icon to exit from the My
Calendar page.
icon to exit from the My
Calendar page.
Make sure the My Calendar page is displayed. View field definitions.
Note: if you accessed the My Calendar page from a specific client's record, the staff member assigned to that record is displayed in the second drop down list and the first drop down list displays the Single-Staff View option.
If your calendar is not displayed, select your name from the second drop down list.
Make other changes as needed in the Filter fields.
Click the Apply Filter button.
Your calendar should be displayed.
Click the Service button in the calendar task bar.
The Service Note page is displayed.
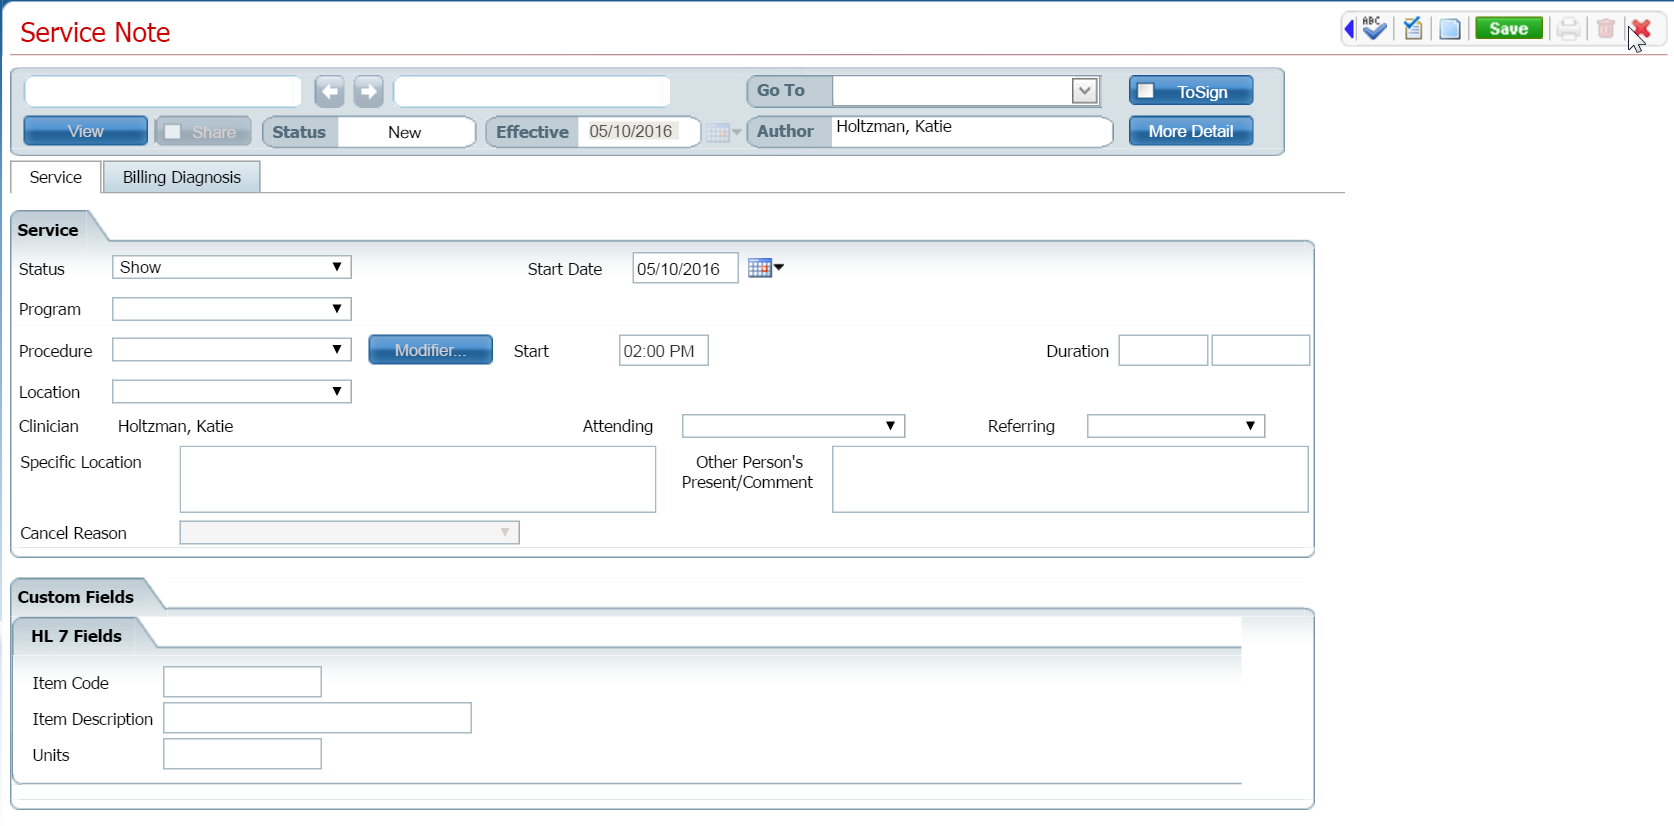
Complete the Service Note page. View field definitions.
Make sure the My Calendar page is displayed. View field definitions.
Note: if you accessed the My Calendar page from a specific client's record, the staff member assigned to that record is displayed in the second drop down list and the first drop down list displays the Single-Staff View option.
If your calendar is not displayed, select your name from the second drop down list.
Make other changes as needed in the Filter fields.
Click the Apply Filter button.
Your calendar should be displayed.
Add a New Service Entry on a Calendar for a Client
Add a New Primary Care Entry on a Calendar for a Client
Add a New Resource Entry on a Calendar